Traditional Boiled Christmas Pudding recipe
This traditional boiled Christmas Pudding recipe is my Great Aunty Dots’, my mum’s mums older sister… not confusing.
I actually never liked pudding, only my Grans (my Dad’s mum). She knew how make a pudding with plenty of Brandy and a decent serving of custard. She’d even hide threepence coins in there too. Which are traditionally mixed through the batter and cooked into the pudding – it was a game of luck to see who ended up with a threepence in their pudding bowl. Although, around our Christmas table, we all won, the game was rigged.
While this isn’t my Gran’s recipe, it’s been hailed by my Dad as ‘very very close’ and he loves it. So do I and everyone who has tried it.
Let’s just say it’s the best Christmas pudding recipe going around, shall we? Deal.
This recipe is anything but ‘healthy’ or wholefood – usually the kind of quick veggie recipes I like to share. BUT, it’s wholesome, full of love, steeped in tradition, evokes the memories and so worth the effort.
If you grew up with an elder making the pudding and they’ve hung up their pudding hat. I invite you to give it a crack.
If you’ve grown up with a packet pudding and never experienced the rich, soothing, depth of flavour from a homemade pudding. I invite you to give it a crack.
If you just love pudding and want to experiment making interesting gifts for your people. I invite you to give it a crack.
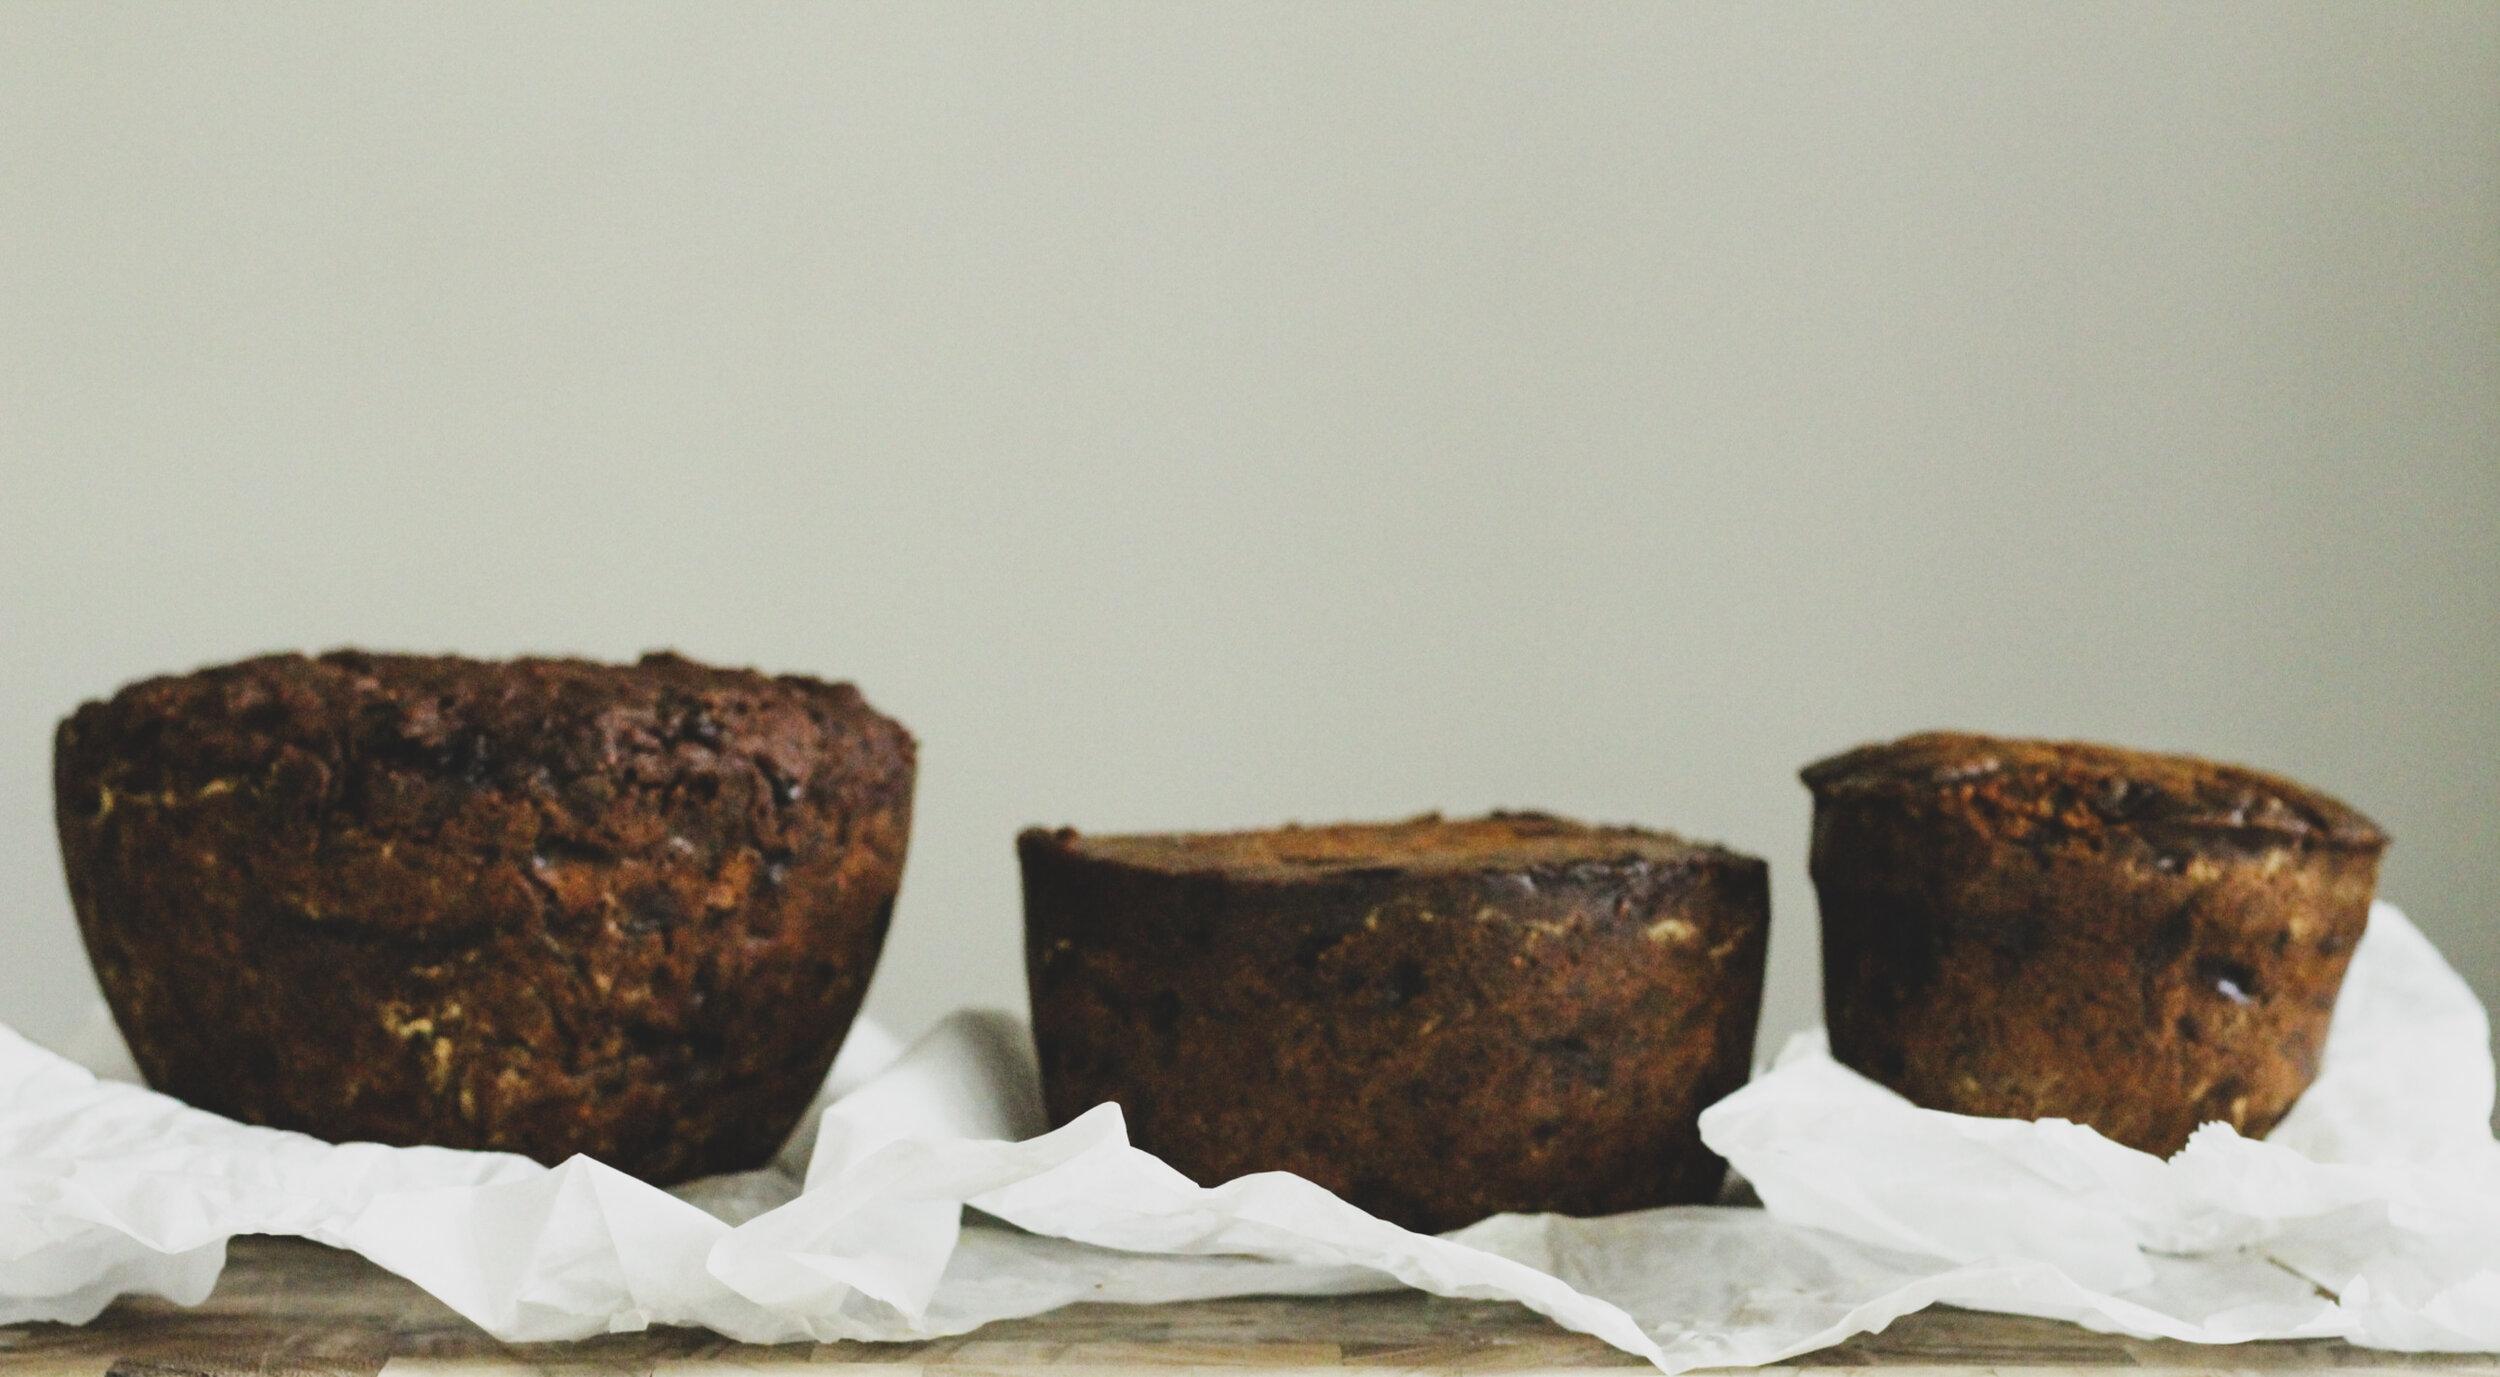
Just so we can get a few things straight – my current pudding count is at 3. I have another 2 on the stove right now. It’s a process.
UPDATE: Pudding count at 12 (as at December 2021)
It’s not difficult, it’s different.
At least it was for me. I had 25 thousand questions for my mum that I asked over and over again. I thought I’d remember for the next year and guess what, I didn’t.
I’ve tried to make the recipe as detailed as I can, but have a good read first, know what you’re in for, then put on those carols and have fun cooking one day.
This recipe is enough for 2 puddings, that will serve 6-10 people each. Depending on your generous slices, or how full you are after your Chrissy feast. I don’t recommend halving the recipe!
Make 2, you’ll find something to do with the second one – gift it to a friend, a neighbour, someone who really needs a pick-me-up. You can also freeze for later, maybe for actual winter in the Southern Hemisphere when this is designed to be eaten and warm your cockles by a big fire and a slurpy glass of rich red.
Another reason to make 2…. Just in case you stuff it up. This recipe takes a long time, your time in the kitchen isn’t required, but, you don’t want to realise after 6 hours of cooking that water got into your pudding basin (not good).
I’ve answered the most common questions I get below under the recipe. If you have more, pop them in the comments and I’l answer them as soon as I can.
Read the recipe once, then twice and if you need some help.
Join my Christmas Pudding Party. It’s a short class in making your pudding and perfect for the type of person who wants to make it but is nervous. I take you through the process, cook along with me. Get instant access to the Christmas Pudding Party.
Ingredients
FRUIT MIX
- 1 kg mixed dried fruit chopped – I like mangoes, peaches apricot, figs, berries and ginger – the more fruity and exciting the better
- 250 g raisins
- 250 g dried dates chopped
- 2 cups water
- 1 cup white sugar
- 1 cup brown sugar – lightly packed
- 1 tsp salt
- 250 g butter
- 2 tsp bicarb soda
WET MIX
- 3 eggs
- ¼ cup rum or brandy
DRY MIX
- OPTIONAL: Small packet almonds - I’ve never used the almonds I always forget! My friends tell me the same thing when they make it… so almonds are very optional
- 2 cups plain flour sifted
- 2 cups self raising flour sifted
- 2 tsp mixed spice - Mixed spice is also called Pudding Spice. It’s a mix of cinnamon and nutmeg. I think you could experiment with tiny amounts of ginger and vanilla bean too.
- 1 tsp cinnamon
- 1 tsp vanilla bean
FOR STEAMING
- Water
- A big stock pot that fits your pudding basin
- A handful of coins to put in the bottom of your stockpot
- Foil to wrap up your pudding basin and ensure water doesn’t get into your pud
- String to tie up your basin wrapped in foil and create a nice little tie to help you get your pudding out of the water once you’ve cooked it
Instructions
- Place your fruit mix and wet mix ingredients in a saucepan: chopped dried fruit, raisins, roughly chopped dates, water, sugars, salt and butter.
- Stir over low heat until butter has melted.
- Simmer mixture 8 minutes and stir occasionally. Remove from heat and stir in bicarb soda.
- Put mixture aside to cool completely cold.
- I transfer into 2 long ceramic dishes and spread the mixture out as thin as I can. The more surface area you have, the faster your mix will cool down.
ONCE YOUR MIXTURE HAS COOLED
- Lightly beat together 3 eggs and rum/brandy, stir into cold mixture.
- Pour boiling water over almonds, stand for a few minutes, remove skins and chop up.
- Fold almonds into mixture.
- Add sifted flours, mixed spice, cinnamon and vanilla, mix well.
- Steam your pudding.
TO STEAM YOUR CHRISTMAS PUDDING
- Don’t freak out, this is simple but there are a few rules.
- Don’t let any water get into your pudding. Wrap up tight with foil.
- Fill your water half way up the pot (no more).
- Add coins into your pot so you can hear that the water is boiling and at a good temperature.
- Check water periodically to ensure there’s enough to create steam. Replenish as necessary with boiling water from your kettle.
LET'S STEAM
- Fill mixture into a well greased pudding basin.
- Place the pudding basin lid on tight. If your basin doesn’t have a lid, wrap up with foil – leaving some room at the top for your pudding to rise.
- Use elastic bands to secure foil in place and to stop water getting into your pudding. You can make a handle for your pudding out of string too so it’s easier to remove from the pot at the end of the cook.
- Grab a bigger pot with a lid. The pot needs to fit your pudding basin completely inside. Ideally a lid without a steam hole, like a dutch oven pot, this is to keep all the steam in.
- If you don’t have this you’ll just need to watch the pot a bit more and make sure steam is building up in the pot. The steam is what cooks the pudding.
- Place some coins in the bottom of the pot. As the water boils the coins will rattle and this is your sign the water is at the correct temperature.
- Put pudding in pot.
- Fill water ½ way up the side of your pudding basin.
- Bring water to a boil. Place lid on pot. Reduce to a simmer. You’ll hear the coins rattle around, which means the water is at a good temperature. If you don’t hear the coins, the temperature isn’t high enough.
- Place lid on pot and steam for 6 hours. Replenish water levels when necessary with boiling water.
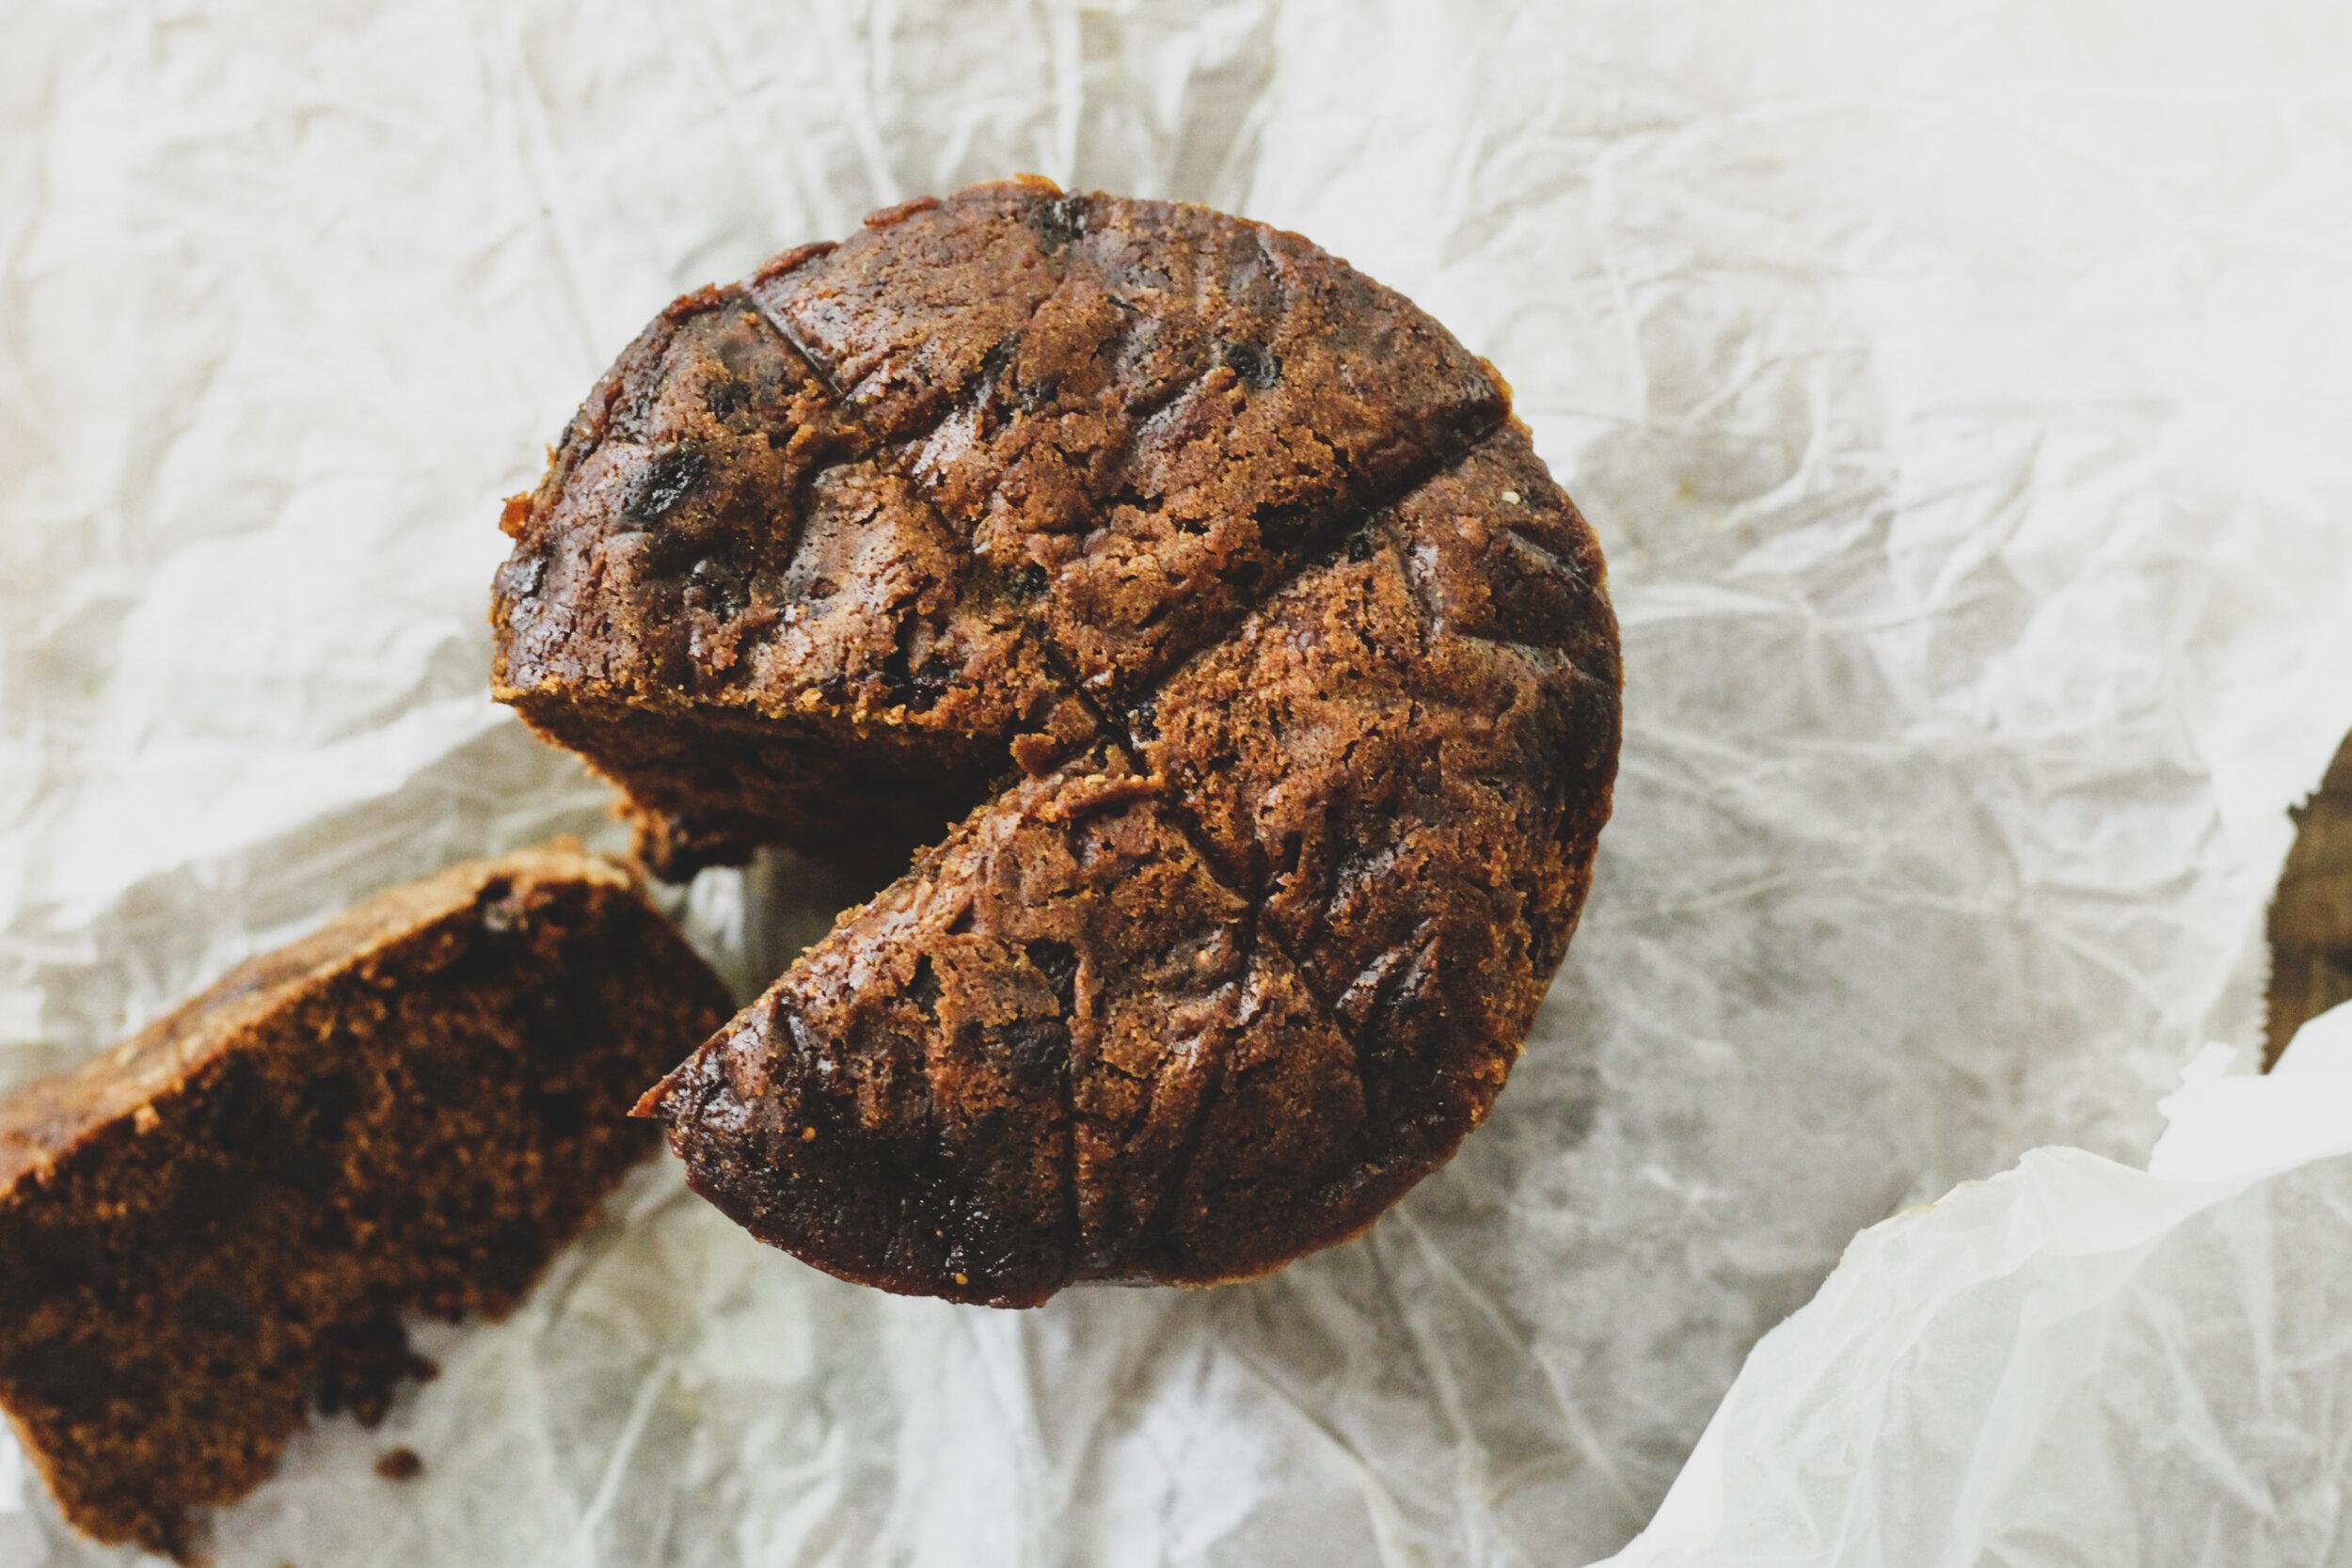
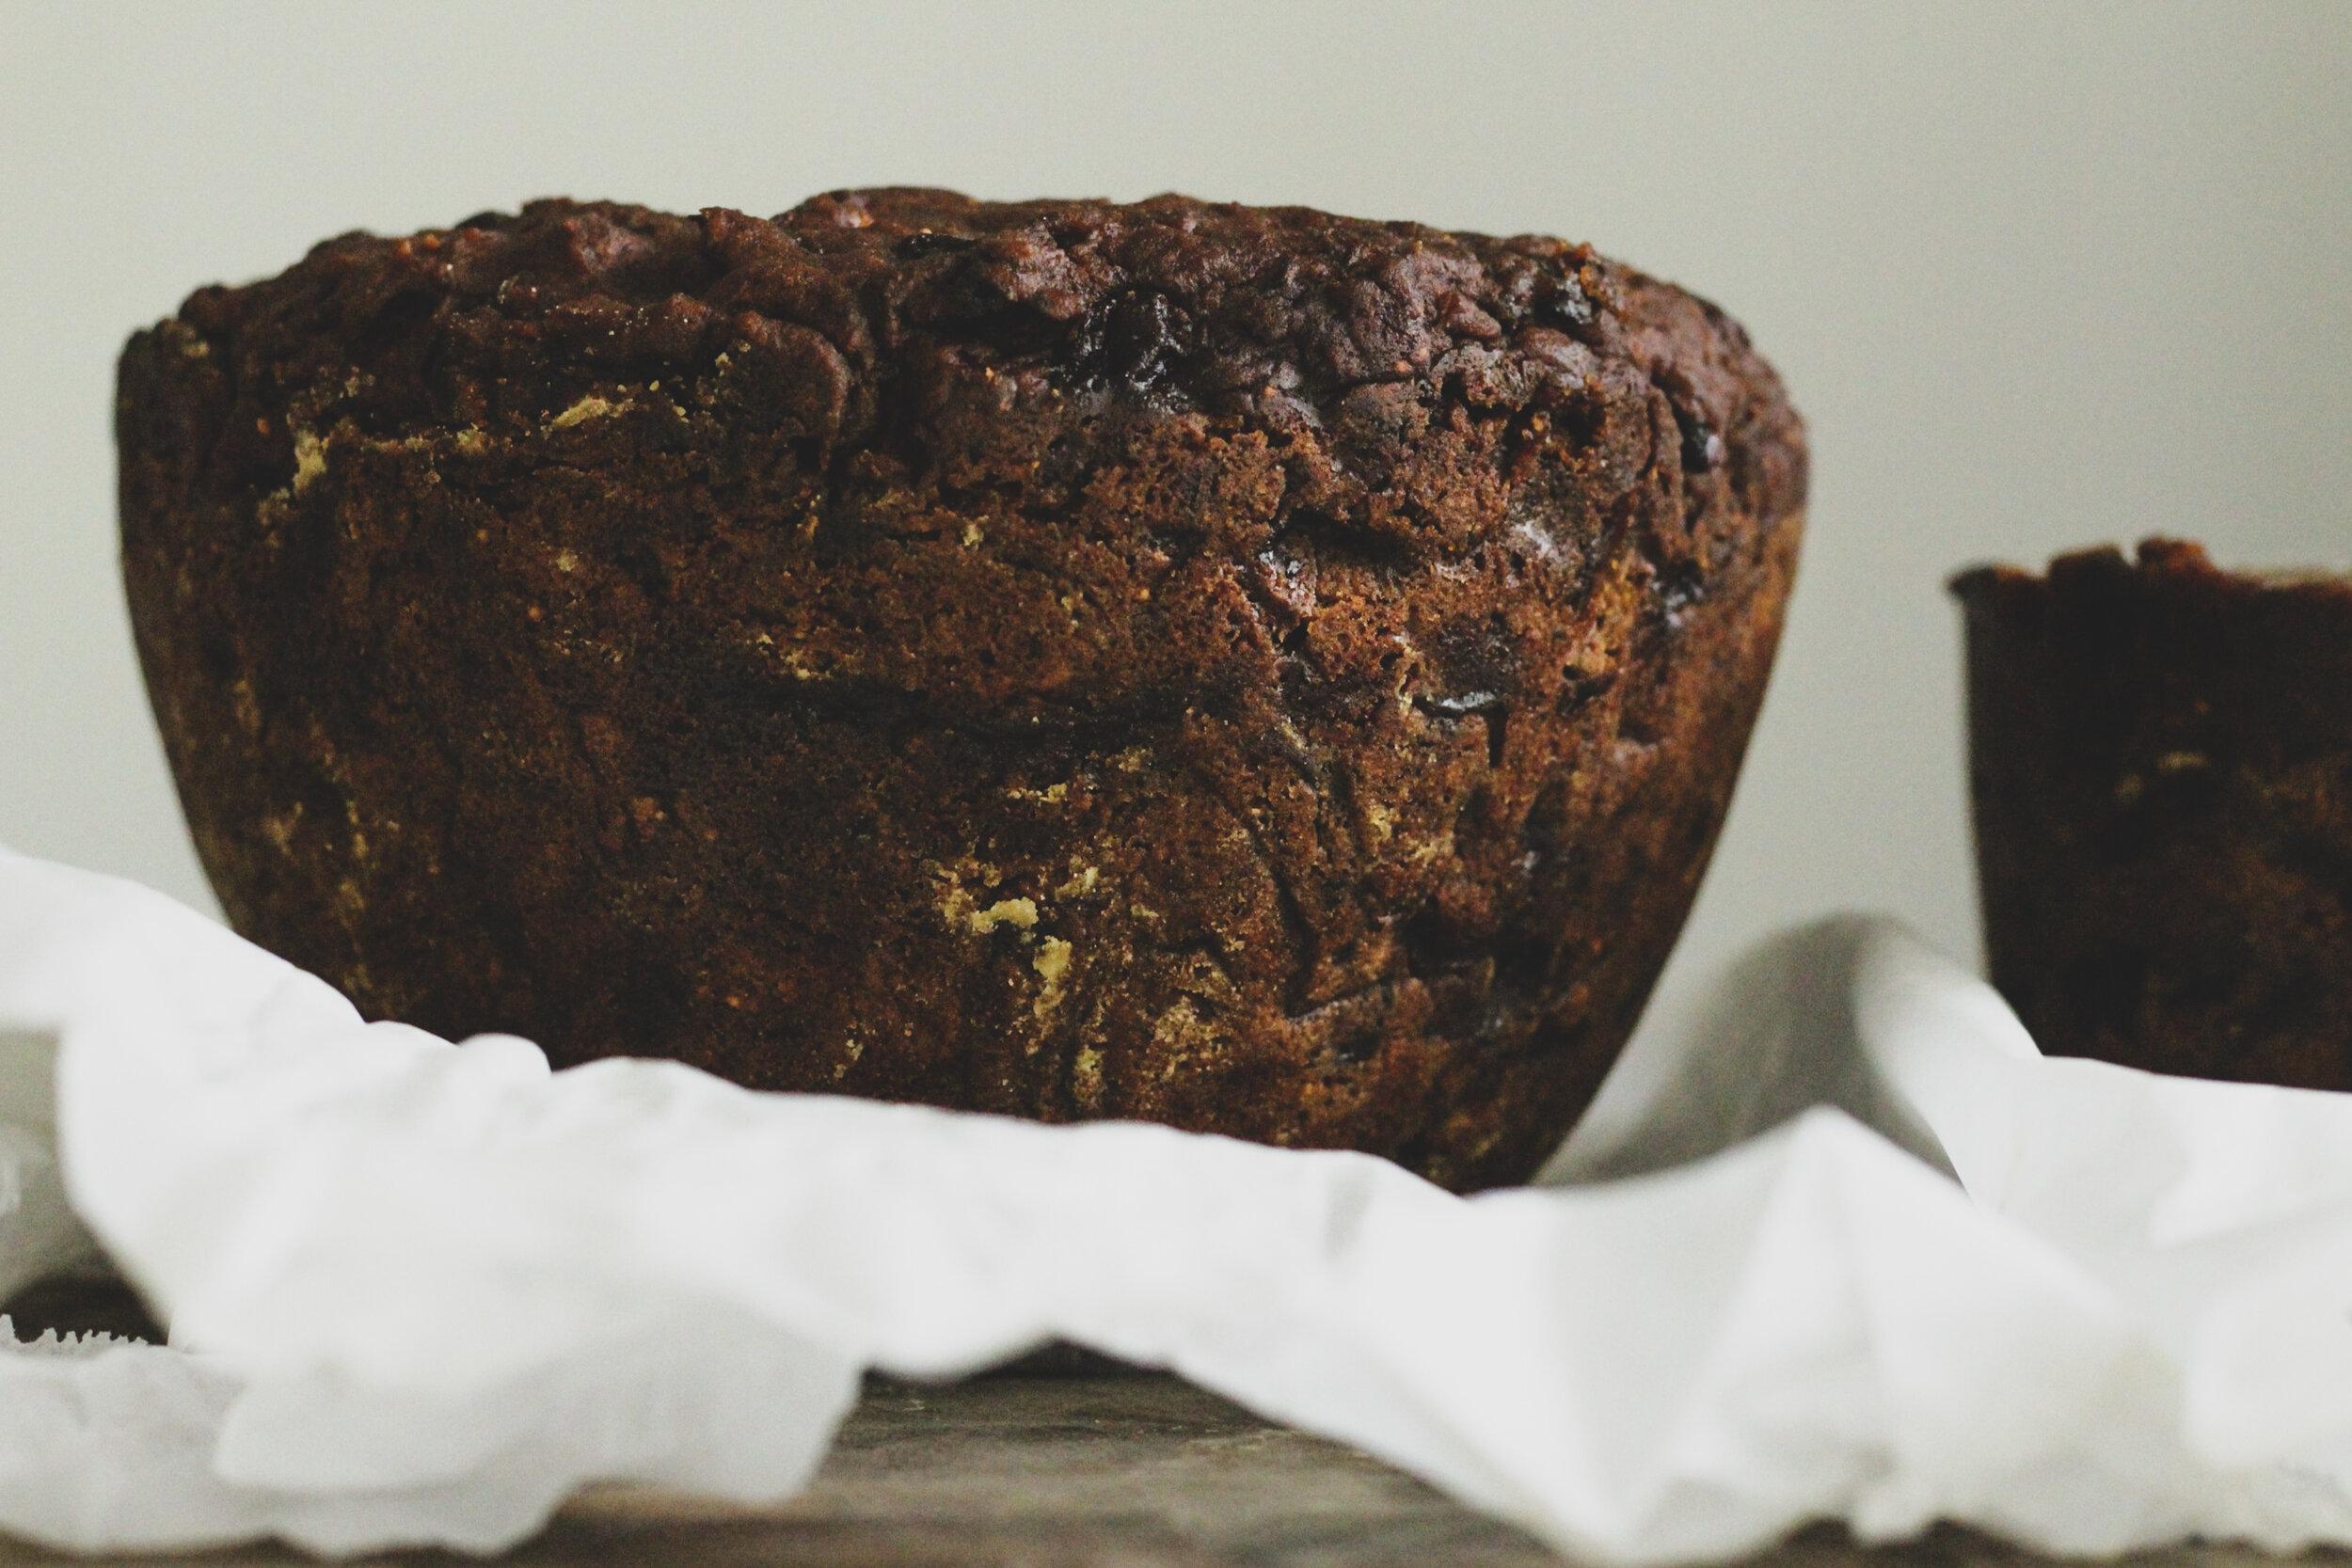
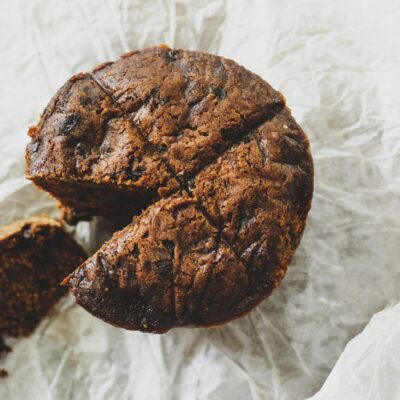
- Remove pudding from the pot and leave to cool.
- Gently run knife around the edges of the pudding basin and tip over to release pudding.
- Leave to cool completely on a chopping board. I usually place a tea towel over mine and leave to cool overnight.
- Wrap in baking paper and clingfilm. Store in fridge until required.
- Steam a further 2 hours on the day of serving. Or if you want to eat it cold, steam for 2 hours a few days before you plan to serve.
Christmas Pudding tips:
-
I have one big pudding basin, this one from Myer. If you had 2 of these, you’d use all the mixture.
I then use 2 smaller ones I borrow from my mum each year. One is about 50 years old from my Gran, the other is a ceramic style one. Neither have lids, so I wrap really well with foil before steaming to make sure no water gets in the pudding. -
Put your fruit mixture on to cook early. It will take a long time to cool down. You need it to cool so you can add the eggs safely without scrambling them.
-
Your coins don’t go IN your pudding – back in the day, threepence and sixpence were cooked into the pudding and it was a sign of good luck if you were served a slice of pudding with a coin in it – you know, prosperous year etc… Our coins these days are not safe to do this. BUT we use coins in the bottom of our stock pot (which doesn’t come in contact with our pudding at all) – so we can hear that the water is gently boiling. The coins will rattle around and this is the sign your pudding is at at good temperature. No rattling – no cooking.
-
The longer you steam your pudding, the more flavour it produces. 6 hours is a good amount, if you need to, you could do this over 2 days.
-
Traditionally puddings are cooked 1 month before Christmas, the longer your pudding sits the more flavour it develops over the month. Last year I made mine 2 days before Christmas, this year I’ve extended to 10 days. I’ll let you know the verdict. It also means you can spread out your workload so you’re not standing over a hot stove on Christmas eve.
UPDATE: yep, the earlier you cook your pudding the better. For taste, but also for stress levels, busyness and just feeling a little bit more organised. -
Store cooled pudding at room temp/ a cool temp and out of the sun. Wrapped up well or in an airtight container. Pudding will last for a long time like this, I think I read 2 years – I don’t know where, it was on the internet, not sure I’d try that but there is a real lot of sugar in there.
Just so you know, because I live in Australia and Christmas is hot and sweaty – I store mine in the fridge to keep it cool. -
Dried fruit can be pricey, especially if you want the good stuff. My plan over the next year is to dehydrate the fruit when it’s in season, so I’m in control of the ingredients (lots of dried fruit has oil or preservatives) and I can preserve with the seasons when fruit is at its bounty. First up will be peaches, apricots, plums and mangoes – then I might skip to winter/spring with berries
UPDATE: I didn’t do this, I remembered in June right before I had a baby. I’ll do this next year for Christmas 2021.


")